title: Mastercard Data Connect
The Mastercard Data Connect application (Data Connect app) allows your customers to connect to their Financial Institutions (FIs) and permission the accounts they want to share. This gives Mastercard the authorization to access the customer’s financial data and share it with a third party. Customers can manage their shared accounts through the Data Connect app, or through their Financial Institution’s website if available.
How it Works
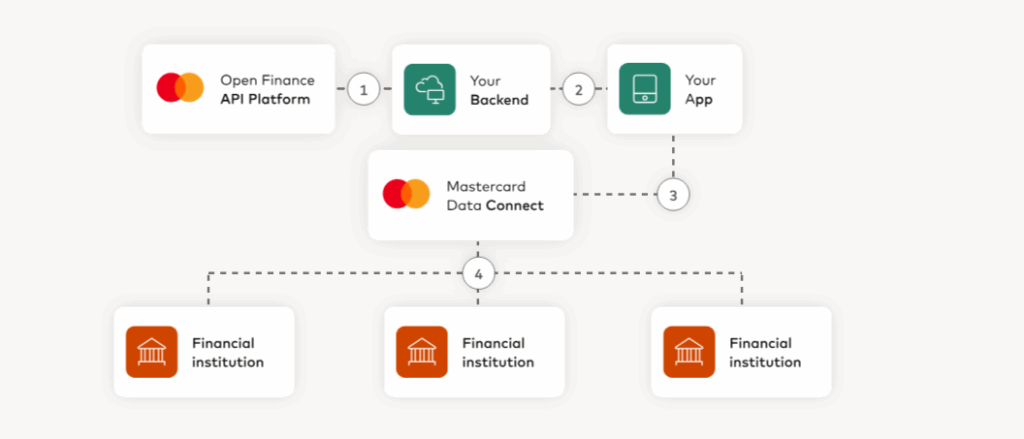
Your app will display the Data Connect app to your customers. They go through a Data Connect experience to find their Financial Institution, log in, and permission the accounts they want to share. After the customer reviews and submits their financial data, the Data Connect session ends and they will resume your application flow.
- Connect your environment to our Open Finance API platform.
- Generate a Data Connect URL and add it to your application.
- The customer follows the URL and goes through the Data Connect application flow.
- Customers connect to their Financial Institutions and permission their accounts.
The Data Connect Flow
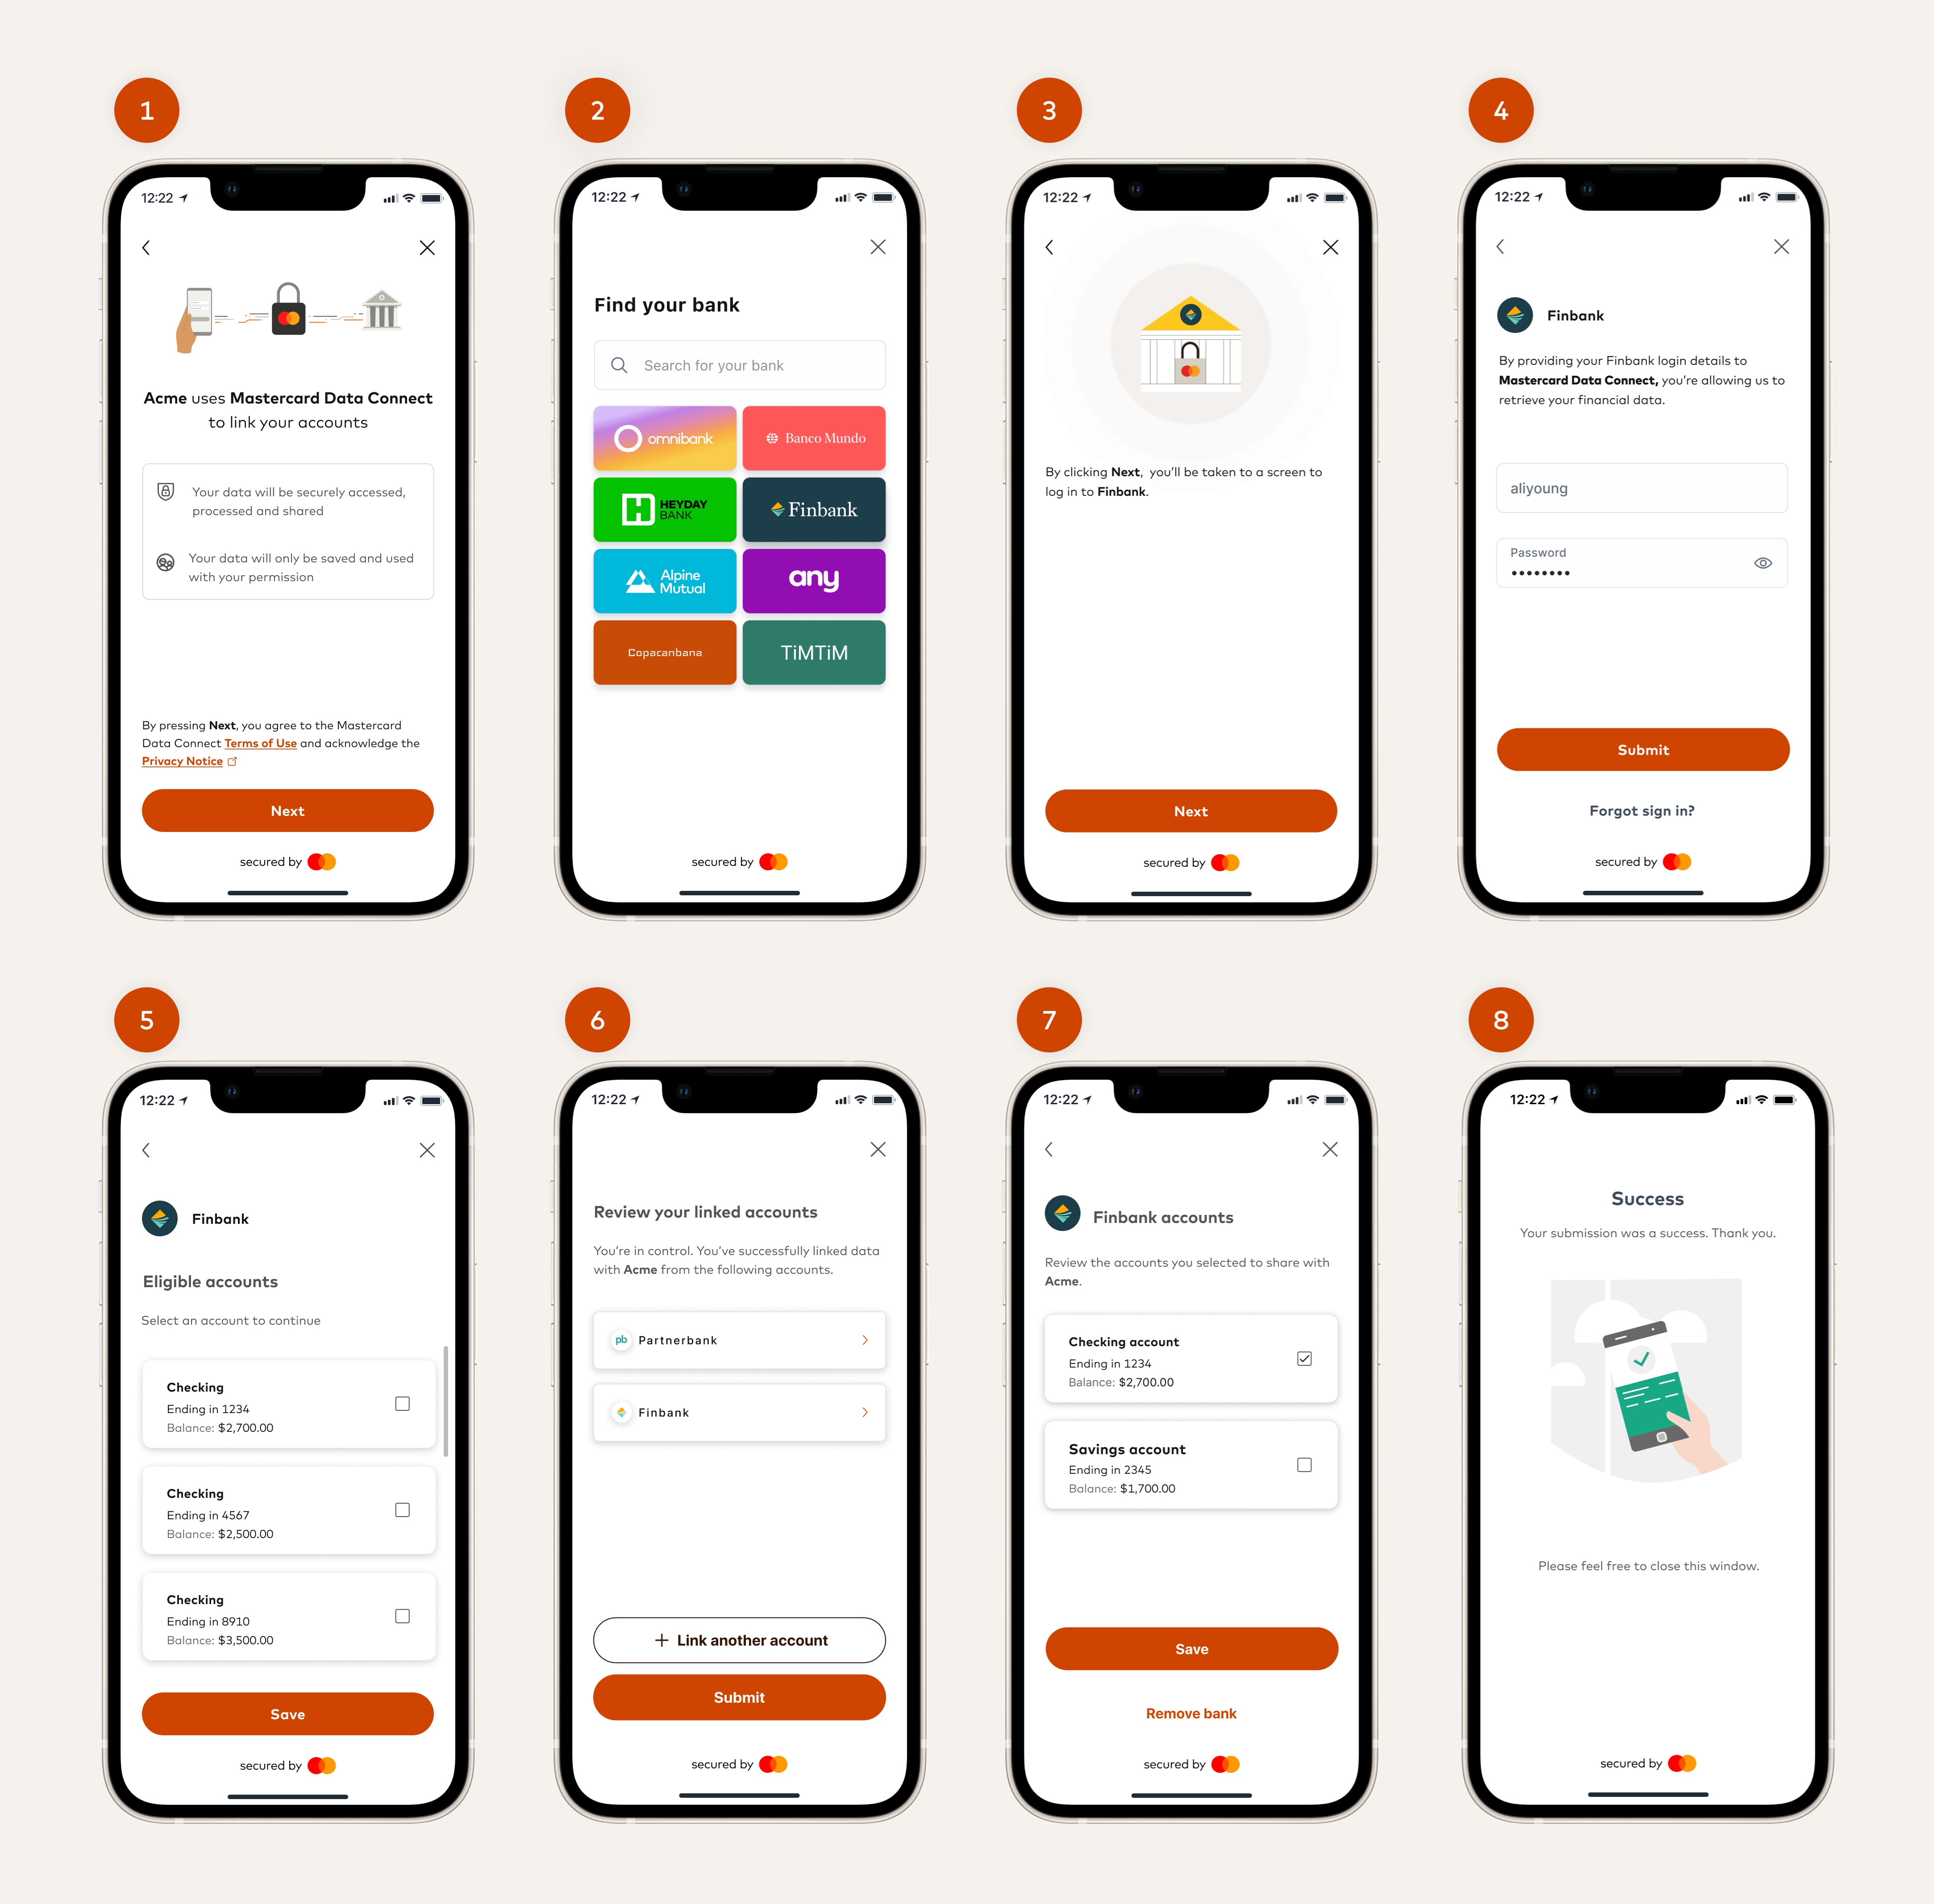
The following UX screens show the Data Connect Full experience flow.

- Accept the Terms and Conditions and the Privacy Policy agreement.
- Search Financial Institutions.
- Connect to a Financial Institution.
- Log in to the Financial Institution.
- Select the accounts to share financial data.
- Review your connected accounts and the account details.
- Review the accounts you selected to share with Mastercard.
- After the data is successfully submitted the Data Connect session ends.
[!NOTE]
You can change the Data Connect default flow and configure one or more experiences, changing the brand color, logo, icon, and other options. See Configure the Data Connect Experience.
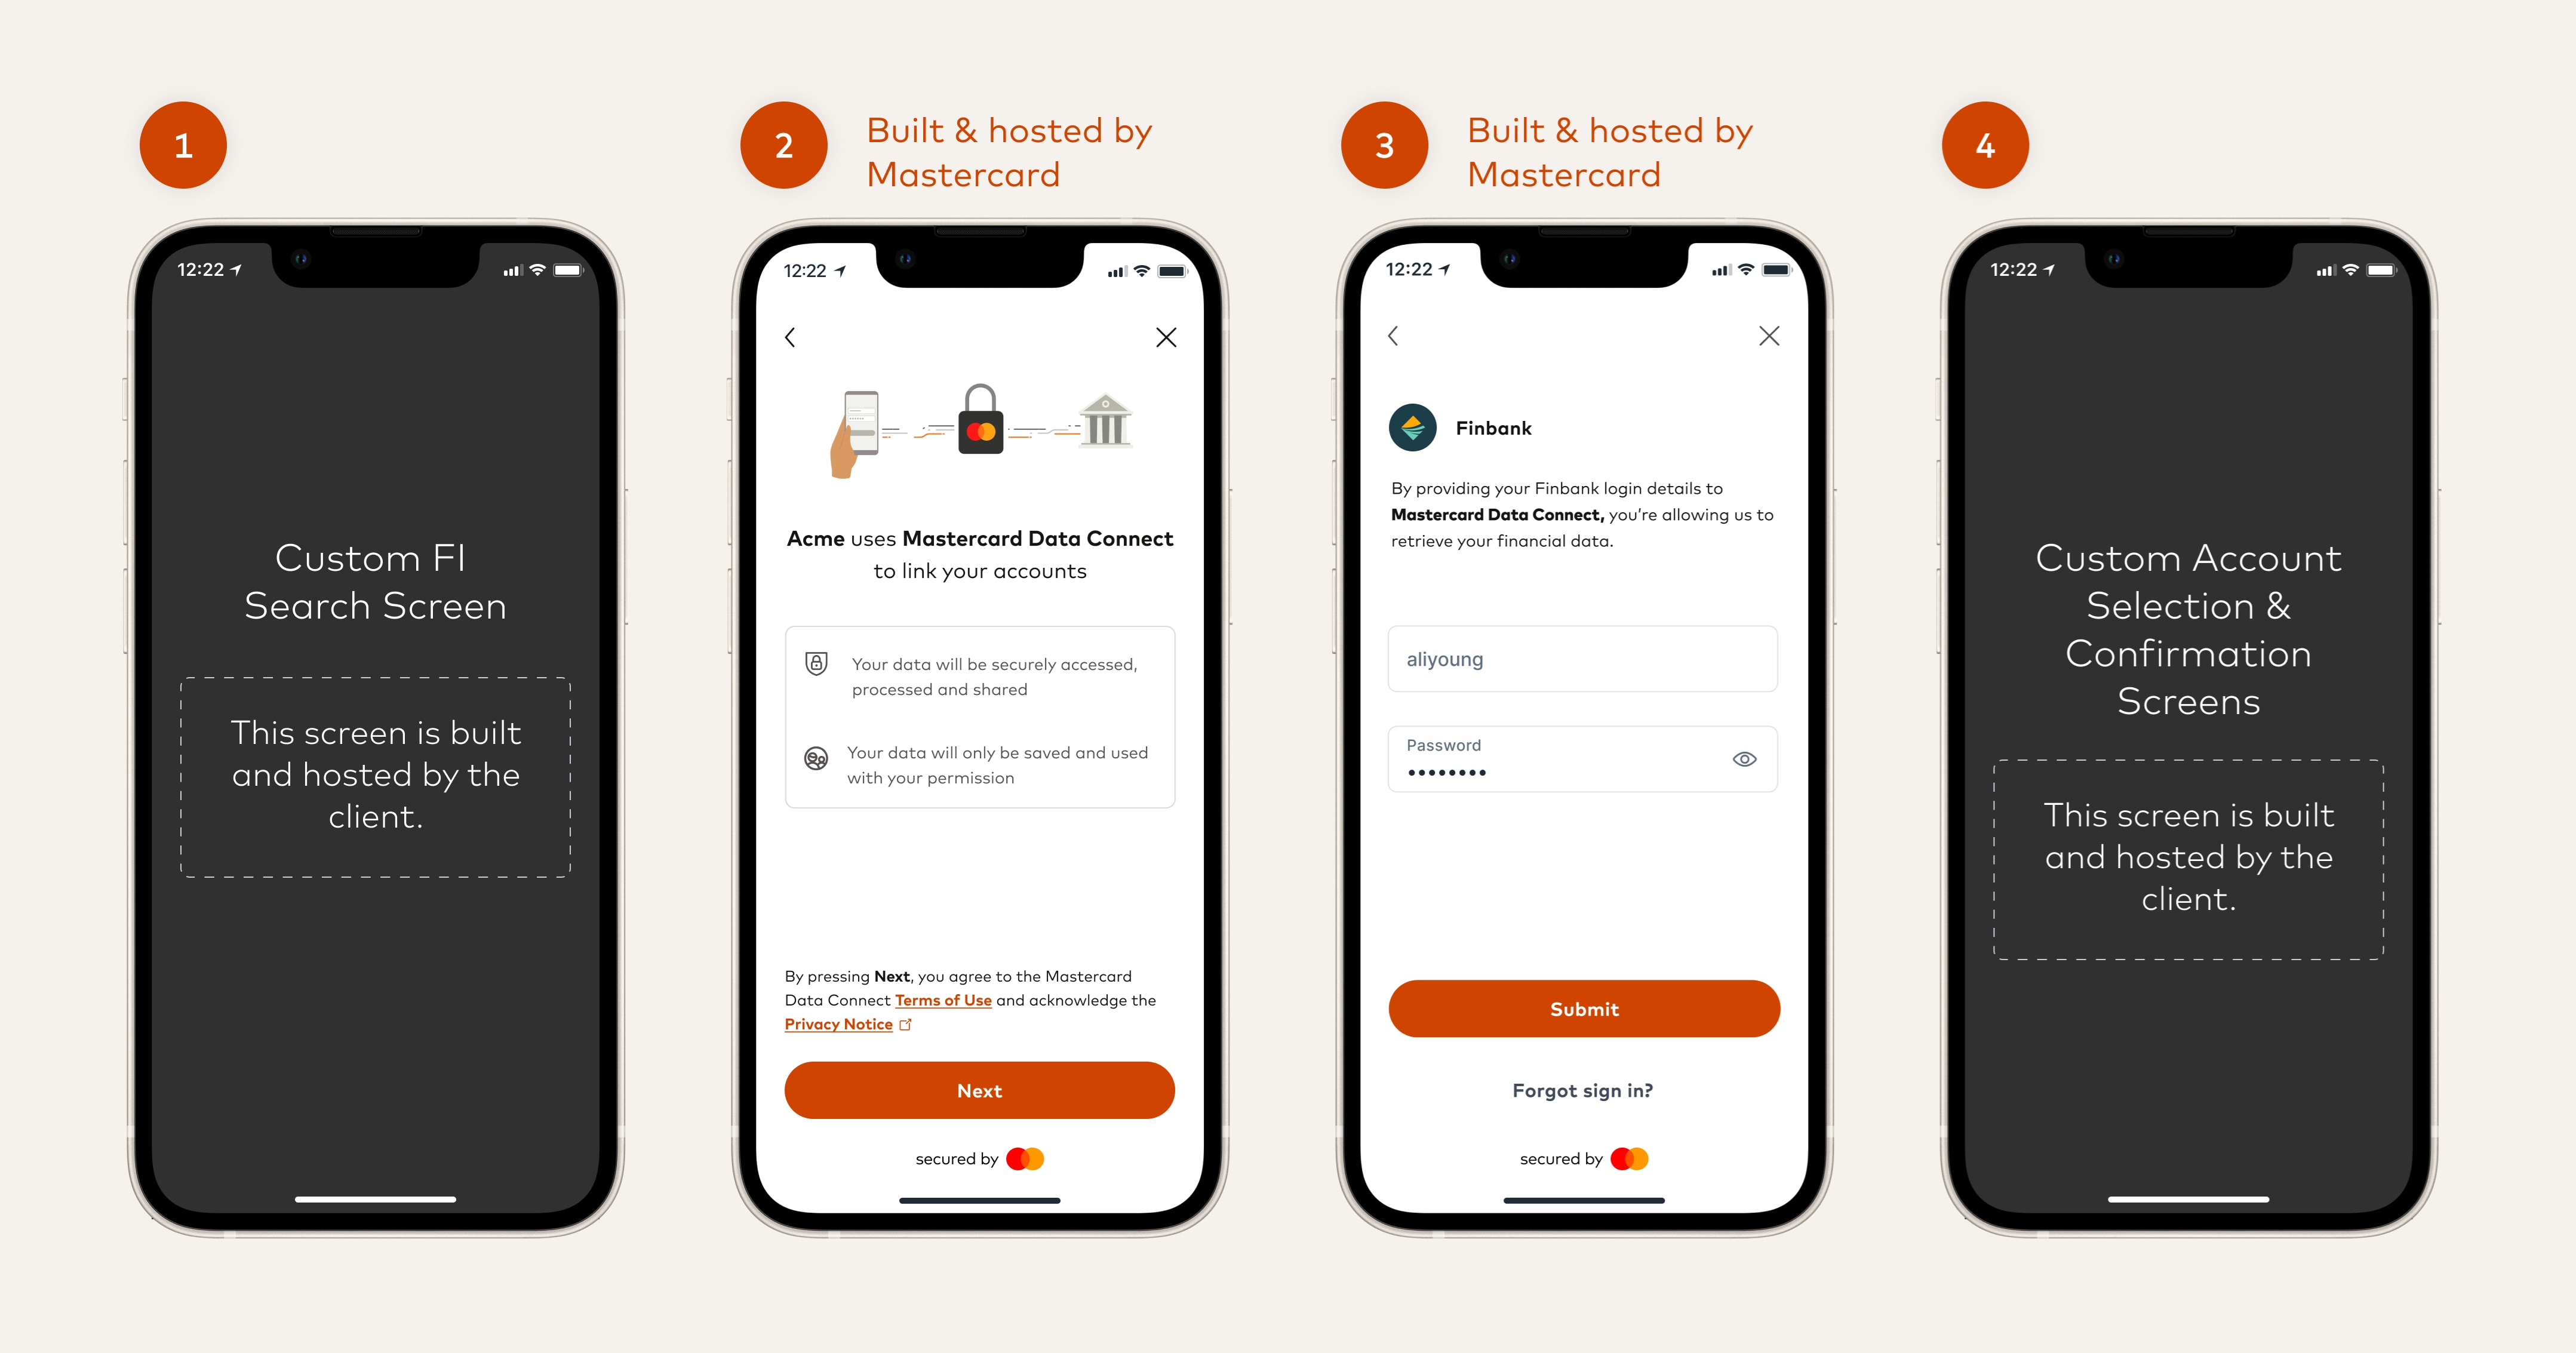
If you want to create your own Financial Institution search and account selection screens, you can use Data Connect Lite, instead of Data Connect Full. Data Connect Lite allows you to own more of the experience for a seamless UX.
With Data Connect Lite the screens shown will be as follows:

- You will provide own screen where the customer can search for and select a Financial Institution.
- Once the user selects a Financial Institution you call Data Connect Lite (with the ID of the selected institution) and Data Connect launches with the Terms and Conditions and Privacy Policy agreement screen.
- The user can then log in to the Financial Institution.
- Control then returns to your application where you can show your own screens for account selection and confirmation.
[!TIP]
If the Financial Institution has a direct (OAuth) connection then the login screen will be hosted by the Financial Institution itself.
Where the Financial Institution hosts the login screen, it might also show an account selection screen, or in some cases it will automatically add all the eligible accounts, rather than present a selection screen. See the OAuth Connections section for suggestions if you would rather handle account selection yourself.
See the Data Connect section of our Experience Design Guide.
[!NOTE]
We also provide a special version of the Data Connect experience, Data Connect Transfer, which allows consumers to also connect to payroll providers or merchants / service providers. This is useful for the following:
- Enable consumers to easily switch their payroll deposit to a new account (Deposit Switch)
- Enable consumers to switch recurring automatic payments to a new account (Bill Pay Switch)
For example, you can use Deposit Switch to allow a new banking customer to easily authorise the payment of their salary into their new bank account. With Bill Pay Switch, the customer can also move their recurring payments (for example, their Netflix subscription, their Amazon or Apple account, or other regular bill payments).
These are separate products which are not supported by the regular Data Connect application and SDKs.
See the Deposit Switch and Bill Pay Switch documentation for details.
Next Steps
- Integrate using one of our Data Connect SDKs (for mobile and web), or using webviews. See Integrating with Data Connect.
- Generate a Data Connect URL for your application. See Generate Data Connect URL.
- If you are interested in using Data Connect Transfer for Deposit Switch or Bill Pay Switch, see Deposit Switch and Bill Pay Switch.

